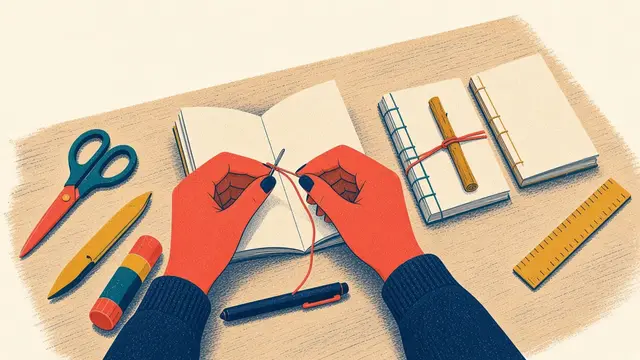
To sew a coptic stitch, pierce every section through a four-station guide and pierce each covered board 8 mm (5/16 in) from its spine edge at the same heights. Sew the first section to the front cover by looping round the board edge at each station, then add each new section by passing the needle under the stitch below at every station, which builds a chain. Attach the back cover with the last section and tie off inside with two half hitches.
In this guide
The coptic stitch sews sections directly onto two separate hard covers and links each section to the last with a row of chain stitches across the spine. Nothing is glued to the spine, so the book opens completely flat at every page. That is why it is the classic sketchbook binding, and why it looks so good with coloured thread.
It is also the binding where most first attempts go loose or crooked, almost always for one of four reasons: holes that do not line up, cover holes too far from the edge, stitches not tightened at every station, and the needle passing under the chain from different sides. This tutorial is built around avoiding all four. If you have never sewn a section before, make a pamphlet-stitched notebook first: the bookbinding for beginners guide explains why and shows where coptic sits among the other bindings.
Time: about 3 hours · Difficulty: medium · Finished size: 5½ × 8½ in or A5 · Pages: 8 sections of 3 folios, 96 pages · Opens: completely flat
What you need
- 8 sections of 3 folios each, of 120–150 gsm drawing paper, 5½ × 8½ in or A5, with the grain running along the fold
- Two boards of 2 mm greyboard, each the size of a page, grain running from head to tail, covered on both sides
- Waxed linen thread, 4-ply, about 2.5 m (8 ft) in total, and a needle (a curved needle helps but is not essential)
- An awl, a scrap of board to pierce onto, and a bone folder
- A four-station piercing guide and a board-hole gauge (the free template pack has both; see the end of this guide)
Grain first. Letter and A4 copy paper is usually long grain, so a whole sheet folded in half puts the grain across the spine and the pages will fight the binding. Use short-grain paper, or cut half-size sheets from Tabloid or A3. The beginner’s guide shows four quick grain tests.
Covering the boards. Cover each board on both sides so it cannot curl: cut the covering 15–20 mm larger than the board all round, glue it on, cut the corners at 45° leaving about one and a half board thicknesses (3 mm for 2 mm board), turn in the long edges, tuck the corners, then turn in the short edges. Line the inside and dry the boards under weights overnight before you pierce them.
Thread: how much and how to manage it
For a multi-section book, cut the section height times the number of sections, plus one more height, then add about 30 cm (12 in) for the cover attachments. Eight A5 sections come to roughly 2.2–2.5 m. That is too long to pull through comfortably, so sew it in two or three lengths of up to 1.5 m and join each new length with a weaver’s knot inside a section, where the knot hides in the fold.
Lock the thread on the needle before you start: pierce the short end with the needle point about 5 cm from its end and pull the long end, so the short end slides down over the eye and cannot fall out.
Sewing the coptic stitch
Step 1: Pierce the sections and boards
Make a piercing guide: a strip of paper as tall as the sections, folded along its length, with four stations marked on the fold. Keep the end stations about 15 mm from the head and tail, and measure every station from the head, not from the previous mark. Write HEAD at the top.
Open each section over a cradle, lay the guide inside the fold, head edges flush, and push the awl straight down through each mark. Pencil the section number on its first page.
Then lay the board-hole gauge on the inside of each covered board, against its spine edge, and pierce four holes 8 mm (5/16 in) in from the edge, at the same heights as the stations, onto a scrap of board.
Step 2: Attach section 1 to the front cover
Lay the front cover face down with section 1 on top, holes aligned. Start inside section 1 at the head station, leaving a 10 cm (4 in) tail. Come out, take the thread round the spine edge of the cover and in through the cover hole from the outside, so it comes up between cover and section. Pass the needle under the thread you have just made, from the head side, and go back into the same station. Tie the tail to the working thread inside.
Step 3: Work along section 1
Inside the section, go to the next station and come out. Attach to the cover in exactly the same way: round the edge, in through the cover hole, up between cover and section, under the stitch, and back in. Repeat at every station. At the last station, after attaching to the cover, go straight up into section 2 at the same station instead of back into section 1.
Step 4: Add section 2 with a chain
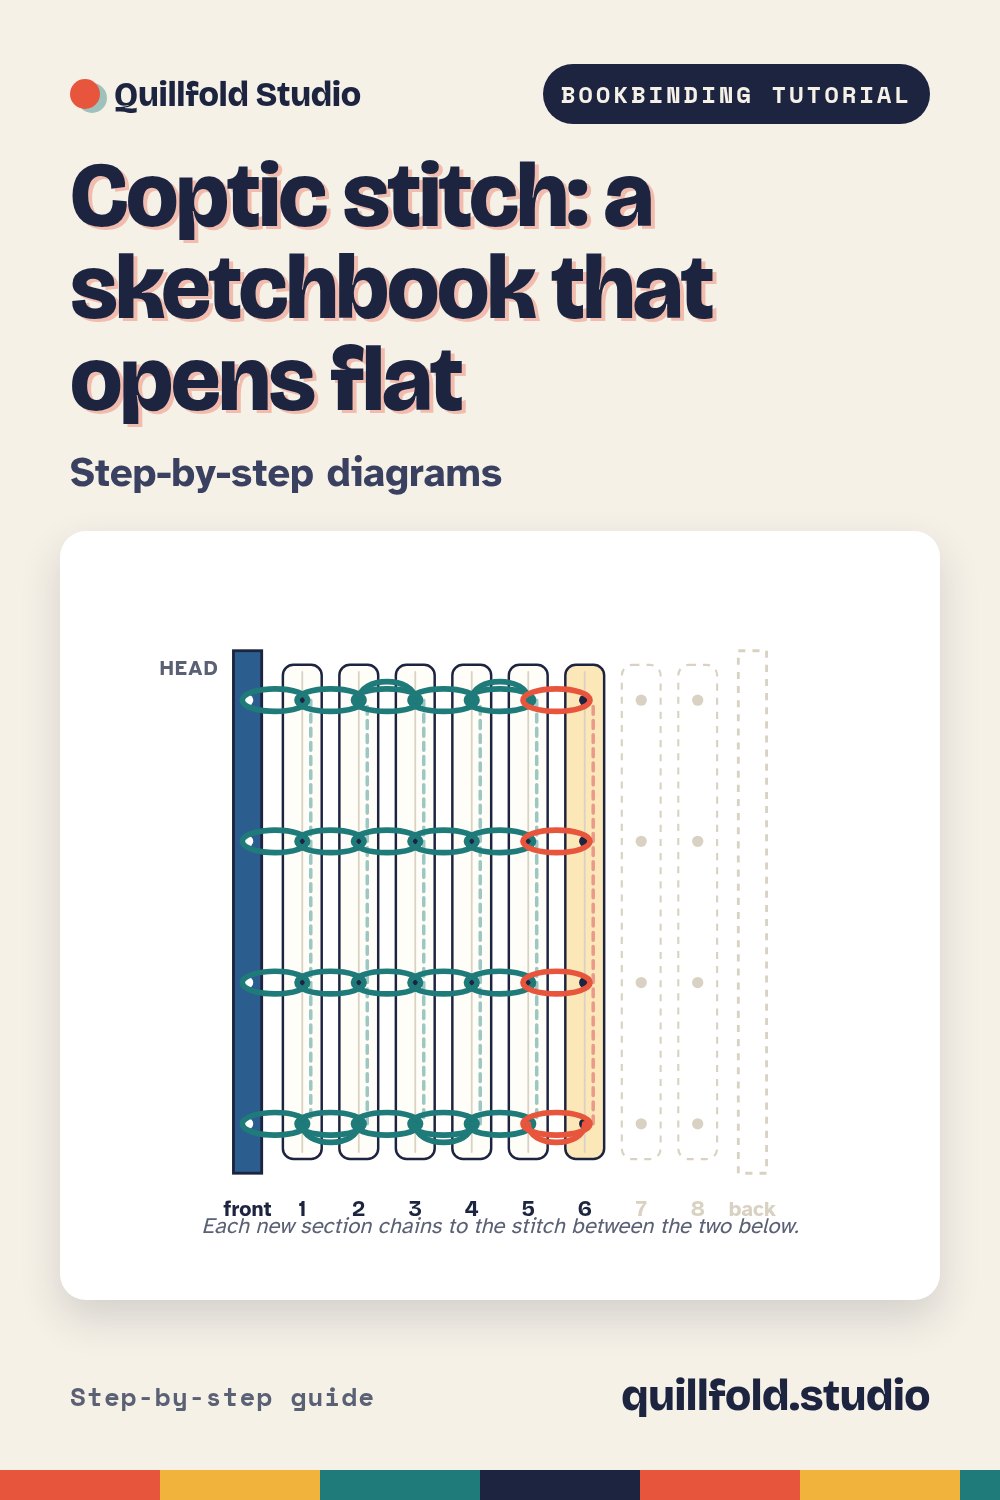
Inside section 2, go to the next station and come out. Slide the needle under the stitch that joins section 1 to the cover at this station, from the outside, and pull up so the thread hugs it. Go back into section 2 at the same station. Repeat at every station. At the last one, after the chain stitch, go into section 3.
Step 5: Build the spine
For every new section, at every station: come out, slide the needle under the chain stitch between the two sections below, pull up, and go back in. Tighten each stitch by pulling along the spine towards the next station, not outwards, and always pass under the chain from the outside of the spine so every link leans the same way.
Step 6: Attach the back cover and tie off
Sew the last section with chain stitches as before, but at each station, before going back in, attach to the back cover first (round its edge and in through its hole from the outside), then slide under the chain between the two sections below, then go back into the station. At the final station, tie off inside with two half hitches round the inside stitch and trim.
What good looks like
Four straight chains run across the spine, one at each station, with every link the same size. The book lies flat when open at any page, the covers sit level with the sections, and nothing moves when you flex the spine.
Troubleshooting
| Problem | Likely cause | Fix next time |
|---|---|---|
| The chains sag between sections | Stitches not pulled tight before moving on | Tighten after every station, pulling along the spine |
| The cover hangs loose | Cover holes too far from its edge | Keep the holes 6–10 mm from the spine edge |
| Sections pull apart at head and tail | End stations too close to the edge | Keep end stations 15 mm from head and tail |
| The chains lean in alternate directions | Needle passed under the stitch from different sides | Always pass under from the outside of the spine |
| Holes do not line up from section to section | No guide, or the guide shifted | Pierce every section through one guide, head edges flush |
| Thread tangles and frays | Working length too long | Sew in lengths of 1.5 m at most, joined inside a section |
Coptic stitch vs kettle stitch vs long stitch
These three get confused because all of them join several sections with one thread.
| Coptic stitch | Kettle stitch | Long stitch | |
|---|---|---|---|
| What it is | A whole binding: a chain at every station | A linking knot at the head and tail stations only | A whole binding sewn through a soft cover |
| Covers | Two separate boards, sewn on | Whatever the binding uses, often hidden | One wrap-around soft cover |
| Spine | Exposed chains | Hidden or exposed, depending on the binding | Long stitches show on the cover spine |
| How it opens | Completely flat | Depends on the binding | Flat |
| Glue | None | Often a spine lining | None |
Which should you sew? For a sketchbook or anything you will draw across both pages, coptic. For a soft travel journal with no boards, long stitch. The kettle stitch is not a choice so much as a skill you will use inside most multi-section bindings, including hardcovers.
Get the piercing guide
The free Bookbinding Template Pack on the reader bonuses page includes the four-station coptic guide and the board-hole gauge at actual size, in US Letter and A4. Print at 100% and check the scale bar. The full twenty-project skills ladder, from a pocket notebook to a cloth hardcover, is in The Complete Bookbinding Handbook, Book 2 of the Quillfold Studio Handbooks, which is coming soon and not yet published.
Frequently asked questions
How much thread do I need for a coptic stitch?
Work out the section height times the number of sections, add one more height, then add about 30 cm (12 in) for the cover attachments. Eight A5 sections need about 2.2 to 2.5 m. Sew it in two or three lengths joined with a weaver's knot inside a section, because thread longer than about 1.5 m tangles.
What thread is best for coptic binding?
Waxed linen, 3- or 4-ply. It is strong, holds a knot and grips the paper so the chains stay tight. Waxed polyester also works and is very strong, but it is slippery, so tie three throws in every knot.
Do I need a curved needle for coptic stitch?
No. A curved needle makes it easier to slide under the chain stitches between sections, but a straight bookbinding needle works if you open the sections slightly as you go.
What is the difference between coptic stitch and kettle stitch?
A kettle stitch is a small linking knot made only at the head and tail stations to tie each section to the ones below; it is used inside many multi-section bindings, often hidden under a cover. A coptic stitch makes a chain at every station, sews the sections straight onto separate boards, and is left exposed so the book opens completely flat.
How many sections can a coptic-bound book have?
There is no fixed limit, but eight sections of three folios (96 pages) is a comfortable first sketchbook. More sections need more thread joins and a steady hand to keep the chains even; heavier paper needs fewer folios per section.