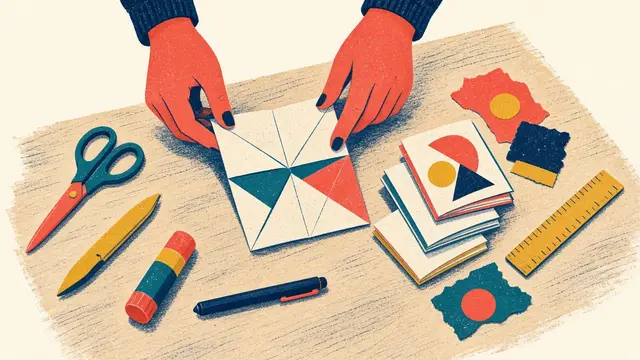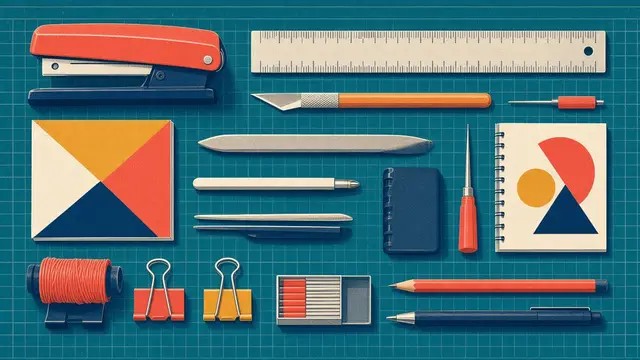
A first zine workshop works best as a 60-minute session built around the one-sheet mini zine: 5 minutes of welcome and examples, 10 minutes folding a dummy together, 5 minutes choosing a prompt, 25 minutes making the pages, 7 minutes finishing the back page and 8 minutes swapping. You need one sheet of paper per person plus spares, scissors, black pens, glue sticks and old magazines. A 90-minute version adds photocopying and stapling a half-letter booklet.
In this guide
- Learning goals
- Materials for 20 people
- Before the session
- Plan A: 60 minutes, one-sheet mini zine
- Plan B: 90 minutes, half-letter booklet
- The fold demonstration, in eight sentences
- Choosing prompts that work in a room
- Access, inclusion and differentiation
- Assessing a zine
- Extending into a course
- Get the printable plan
A zine workshop is one of the most reliable sessions you can run. It needs almost no budget, works across ages and subjects, and every participant walks out with something finished that they made. The trick is structure: a first zine session goes wrong when the folding takes too long or the subject is too open.
The plans below are built around the one-sheet mini zine, because it needs no staples, takes ten minutes to fold, and fits a single class period. A 90-minute version adds a photocopied, stapled booklet.
Learning goals
By the end of the session, participants can:
- Explain in one sentence what a zine is: a small, self-published booklet made for love rather than profit.
- Fold and cut a one-sheet mini zine and put eight pages in order.
- Plan a short piece across eight pages: cover, hook, middle, ending and back page.
- Share or swap their zine, and name one way to copy and distribute it.
These map neatly onto writing, art and design, media literacy and personal and social education goals, which makes zines easy to justify on a lesson plan.
Materials for 20 people
- 60 sheets of Letter or A4 copy paper (three per person, so mistakes cost nothing)
- 20 copies of a one-sheet template (free in the reader bonuses)
- 10 pairs of scissors, one between two
- Black fineliners and markers, one of each per person (black copies best)
- Pencils and erasers
- Glue sticks, one between two
- A box of old magazines, maps and printed scraps for collage
- Two or three finished example zines to pass round
- For the 90-minute plan: 2 long-reach staplers and access to a photocopier
Before the session
- Fold two example zines yourself, start to finish, the day before. Your hands need to remember the steps.
- Lay out one tray per table with paper, pens, scissors, glue and scraps, so nobody waits for materials.
- Put the eight fold steps on the board or a printed sheet everyone can see.
- Choose three prompts per table in advance; an open “make anything” brief stalls most groups.
- Check your photo permissions if you want to document the work.
Plan A: 60 minutes, one-sheet mini zine
| Time | Activity | Facilitator notes |
|---|---|---|
| 0–5 min | Welcome. Pass round examples. “A zine is a small, self-made magazine about anything you like. Today you will make one.” | Keep it short; the folding is the hook. |
| 5–15 min | Fold a blank dummy together, step by step. Everyone numbers the pages 1–8 in pencil. | Demonstrate each fold, then wait until every sheet is done. Pair quick folders with slower ones. |
| 15–20 min | Choose a subject. Each table picks from three prompts, then shrinks it: one day, one street, one list. | “A zine about my day” is always allowed. |
| 20–45 min | Make the pages, on the folded dummy or flat on a template. Draw, write, collage. | Remind people that page 1 is the front cover and page 8 the back. Ask “what happens on page 4?” |
| 45–52 min | Finish and credit. Name, date and “free” or a price on the back. | Fast finishers start a second zine or design a cover for a friend. |
| 52–60 min | Share and swap. Trade in pairs or read one page aloud. | Sharing aloud is always optional. |
Plan B: 90 minutes, half-letter booklet
| Time | Activity | Facilitator notes |
|---|---|---|
| 0–10 min | Welcome and examples; fold a two-sheet dummy in front of the group and number it 1–8. | Show how pages pair: 8 | 1 and 2 | 7 on the outer sheet. |
| 10–20 min | Thumbnail an 8-page zine on a planner sheet. | Stress a clear cover and a back page with a name. |
| 20–60 min | Make the pages at half-letter size, two per side of a sheet, following the page map. | Help with lettering and layout; keep text inside the safe area. |
| 60–75 min | Photocopy double-sided (flip on short edge), fold and nest. | One helper runs the copier; test one copy first. |
| 75–85 min | Bind with a long-reach stapler: two staples on the fold. | Two staplers keep the queue short. |
| 85–90 min | Swap copies and tidy up. | Offer a copy to the library’s zine collection, with permission. |
The page order for the booklet is in the imposition guide, and binding options are in the bindings guide.
The fold demonstration, in eight sentences
Say less than you think. Show each fold, then wait.
- “Hold your paper wide, like a TV screen.”
- “Fold the top down to the bottom. Corners together first, then press from the middle out. Open it.”
- “Fold left to right, crease, open. Now you have a cross.”
- “Fold each short edge to the middle line, crease, open. Count the boxes: eight.”
- “Fold it in half the short way. Cut from the fold along the middle line, one box wide, and stop at the crease.”
- “Open it. Can you see a window in the middle two boxes?”
- “Fold it the long way with the window at the top. Push the ends together gently, like an accordion.”
- “Fold the arms flat into a little book. Flip through it. You just made a zine.”
The full illustrated steps are in the mini zine tutorial, and the lesson plan PDF includes a photocopiable student fold sheet.
Choosing prompts that work in a room
Open briefs freeze groups; specific ones free them. Good workshop prompts are small, personal or useful, and can be done without research:
- One ordinary day, hour by hour
- How to do one thing you are good at
- Eight things in your bag
- A guide to this building or this street
- A comic with no words
- A zine for someone in this room
More are in our zine ideas guide, and the free prompt deck has 96 on cut-apart cards, including a Classroom theme.
Access, inclusion and differentiation
- Pre-folded sheets for anyone with limited hand mobility, and the option to dictate words to a helper.
- Large-print instructions: enlarge the fold sheet (129% takes Letter to Tabloid; 141% takes A4 to A3).
- Wordless routes: comics, collage and list zines suit anyone who would rather not write much.
- Stretch tasks: a secret poster on the back of the sheet, a second issue, or a group zine for the library.
- Sharing is optional. Not everyone wants to read a personal zine aloud. Swapping silently is fine.
Use scissors with younger groups. Hand out craft knives only to adults or older teens with a cutting mat and metal ruler, and collect them when cutting is done. If you teach sewn bindings, count needles and awls in and out. Choose glue sticks over liquid glue for young groups.
Assessing a zine
Keep it light. Look for eight pages in order and the right way up, a cover with a title, a back page with a name, and one clear idea carried across the pages. A two-minute exit slip (what it is about, the part they are proudest of, what they would change, who they could share it with) tells you more than marking ever will.
Extending into a course
A four-session course builds naturally from here:
- What zines are; folding and a first mini zine.
- Booklets and bindings: staples and the pamphlet stitch.
- Layout, lettering and collage.
- Copying an edition, swapping, and a group zine for the library.
Get the printable plan
Download the free Zine Workshop Lesson Plan from the reader bonuses: both timed plans, the materials list, the demonstration script, a student fold sheet and exit slips, in US Letter and A4. The Complete Zine Making Handbook includes the workshop plans alongside the 25 projects you can build a longer course from.
Frequently asked questions
How long should a zine workshop be?
Sixty minutes is enough for everyone to fold, fill and share a one-sheet mini zine. Ninety minutes allows a half-letter booklet that is photocopied and stapled. Forty-five minutes works if you pre-fold the sheets.
What age is a zine workshop suitable for?
The plans here assume about age 10 and up. Younger children can make zines too: pre-fold and pre-cut the sheets, skip blades entirely, and focus on drawing and collage. Adults and teens can move on to sewn bindings.
What materials do I need for a zine workshop?
For 20 people: about 60 sheets of copy paper, 10 pairs of scissors, a black fineliner and marker each, pencils and erasers, glue sticks to share, a box of old magazines, and two finished example zines. Add two long-reach staplers and copier access for a 90-minute booklet session.
How do I explain what a zine is to students?
Keep it to one sentence and then show one: “A zine is a small, self-made magazine about anything you like.” Passing round two or three real examples does more than any definition.
Can students share zines they made in class?
Yes, with their agreement. Swapping is a great ending, but sharing aloud should always be optional, especially for personal zines. Ask permission before photographing work and photograph the zines rather than faces.